|
ceramic tile installation
Floor Preparation
Ceramic tile can be installed over both wood and
concrete surfaces. This article will focus on installations over
concrete surfaces and cover 3 of the most important steps, floor
preparation, choice of thinset, and proper layout. Proper floor preparation is a necessity and care should be
taken to follow each of the following steps in order to ensure the slab is
suitable for
tile installation.

- Go over entire surface with a pole scraper (minimum 6 inch blade), removing paint and other foreign substances.
- Sweep entire area thoroughly to remove all loose debris.
- Using a straight-edge of at least 6 ft., check surface for radical crowns and valleys. Gradual undulations across the slab are to be
expected. Any area not considered acceptable should be 'floated' by using a loose (watered down) mixture of thinset and left to dry. Using a small amount
of Quick-set thinset in the mixture will help hasten drying time.
- Next, check carefully for existing settlement cracks. If any are found, repair them with an approved Crack Suppression method. Simply
cut strips of crack suppression membrane approximately 8 inches wide and apply directly over crack (centered). Note: All new construction slabs should
have Crack Suppression installed over entire tiled area.
Choice of Thinset
 Thinset
is the most important component of the entire installation process.
Regular grade thinset, although suitable for normal tile applications,
may not be your best choice. If a crack suppression membrane was
installed, or you are setting the increasingly popular Porcelain
tile, you must use a Premium Full Flex thinset. In fact, I recommend
that a Premium Full Flex thinset be used for all tile applications.
Proper Layout
Proper layout, although extremely important, is frequently the
most overlooked step in the installation process. Sad to say, many
so-called installers as well as do-it-yourselfers simply wing-it when it
comes to setting tile. As a result, they frequently find themselves 'out
of square' with extremely irregular grout lines. The following steps are
designed as a guide to assist you through this all important process.
- First, determine the 'Number' that will be the standard throughout the
entire job. This is simply the sum of an individual tile plus a grout joint.
This can be done by laying 4 pieces in a grid, just as you would when
installing them. Now measure the distance from the back edge of the front
piece to the back edge of the second one. This distance is the sum of one full
square and the grout joint. For example, lets say the measurement is 17 3/8. To
determine the 'Number' you will need to convert 3/8 into a decimal number.
Simply take 3 and divide by 8 and you get .3750. That means your 'Number'
throughout this job will always be 17.3750.
- Next, determine a starting point. Let's say we are installing a floor in a
room that is exactly 20 by 20 square. You could start by laying 2 pieces (use
same size grout joint when determining number) at the
 baseboard
of the farthest end of the wall and score a pencil line at the tile edge.
Remove the pieces and measure distance from baseboard to line. Go to other end and
mark a pencil line at the same distance. Now chalk a line from mark to mark.
To find out the size of the cut at the opposite wall, measure the distance from
the wall to the chalk line, then divide by your 'Number' 17.3750. In this
example, the answer is 11.8345. This translates into 11 full squares and 84% of
a full piece or a cut of just over 14 inches. This would constitute a great
starting point. What you could now do is measure the same distance at the
perpendicular wall and chalk your line. baseboard
of the farthest end of the wall and score a pencil line at the tile edge.
Remove the pieces and measure distance from baseboard to line. Go to other end and
mark a pencil line at the same distance. Now chalk a line from mark to mark.
To find out the size of the cut at the opposite wall, measure the distance from
the wall to the chalk line, then divide by your 'Number' 17.3750. In this
example, the answer is 11.8345. This translates into 11 full squares and 84% of
a full piece or a cut of just over 14 inches. This would constitute a great
starting point. What you could now do is measure the same distance at the
perpendicular wall and chalk your line.
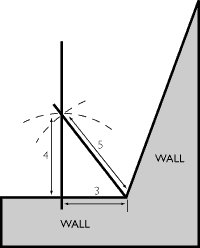
- The very next step is the most important of the entire layout process. You
will need to check for 'Square'. This is done by using the 3-4-5 method.
Measure 3ft. from the chalk line intersection down one of the lines and make a
pencil mark through the line approximately 1/2 inch past on both sides. Next,
measure 4ft. from the same intersection as before, down the other line and
make a similar pencil mark. The distance diagonally from mark to mark should
be 5ft. If not, adjust either line and re-chalk until it measures 5ft. You can
incrementally increase 3-4-5 to 6-8-10, 12-16-20, etc. The larger the
increment, the more accurate your square will be. Once you find 'Square', you
can now start setting.
� 2010 FloorBiz, Inc. All Rights Reserved
For more information on this and other flooring products... FloorBiz is your starting point to all the important flooring
sites on the internet.
Flooring |
Flooring Guide |
Flooring Info |
Flooring Forum
| |


 baseboard
of the farthest end of the wall and score a pencil line at the tile edge.
Remove the pieces and measure distance from baseboard to line. Go to other end and
mark a pencil line at the same distance. Now chalk a line from mark to mark.
To find out the size of the cut at the opposite wall, measure the distance from
the wall to the chalk line, then divide by your 'Number' 17.3750. In this
example, the answer is 11.8345. This translates into 11 full squares and 84% of
a full piece or a cut of just over 14 inches. This would constitute a great
starting point. What you could now do is measure the same distance at the
perpendicular wall and chalk your line.